Pages

 photo img_03.jpg  photo img_04.jpg  photo img_06.jpg  photo img_05.jpg  photo img_07.jpg

"A gourmet who thinks of calories is like a tart who looks at her watch." - James Beard


AOL Ad

Showing posts with label fresh. Show all posts

Monday, September 7, 2015

Putting Up With: Tomatoes Two Ways


My "Putting Up With" series is a play on the phrase 'putting up' as a colloquialism for canning.  But in this case, it's particularly apt, because the only way I can put up with (tolerate) tomatoes is when they're canned, cooked or preserved in some way.  


I was a very picky eater when I was younger, but I've learned to tolerate, and even enjoy, some of the things that horrified me as a child.  I now cook with all types of peppers and mushrooms and even occasionally use mayonnaise and beans, all things I couldn't stand a few years ago.  But I've never grown to love raw tomatoes. Both the texture and taste are repulsive to me.  These recipes have helped me use up all the tomatoes I get every week from our garden and my CSA box.  

Friday, August 7, 2015

CSA - Summer Vegetables Abound


It's too hot. We are not the biggest fans of summer around here. We prefer it when the weather's cooler. 

But one of the things I look forward to every summer is my weekly CSA box.  


CSA stands for Community Supported Agriculture. Farmers essentially sell shares in their crops in advance, then deliver the shares to customers weekly throughout the growing season.  

Sunday, June 14, 2015

Rhubarb-Cherry Sauce for Pork Chops


Rhubarb... I just don't know. 


We signed up for our CSA (Community Supported Agriculture) box again this year. We loved it so much last year and we ate everything, except the rhubarb. This year I was determined to try to use it up so I thought I'd make this sauce to accompany pork.  

The recipe comes from Martha Stewart.  Here's what you need:


Saturday, May 23, 2015

Spring Pasta with Peas and Fresh Herbs


I love spring. I love the mild temperatures and green things popping up everywhere. 

If you need to spend extra time out in the garden this spring, this super-easy meal will save time in the kitchen.  It can be whipped up quickly with staples in the pantry, as long as you have some fresh herbs on hand.  


We love orrcchiette because the little ears fill up with all the ingredients making a perfect bite every time. Here, diced pancetta and peas nestle inside the pasta in a quick cheesy sauce.  This recipe comes from Food & Wine magazine.

Here's what you need for this tasty spring meal. 

Wednesday, March 18, 2015

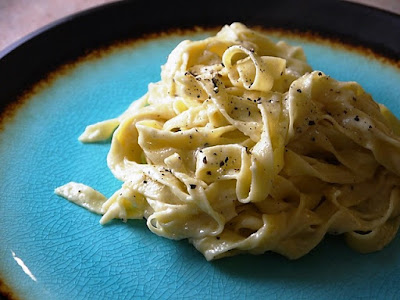
Fettuccine Alfredo

Fettuccine Alfredo

When I was a kid, Fettuccine Alfredo was one of my favourite dishes. Any time we went to an Italian restaurant, it was my go-to treat.  Really, the restaurant or bottled version of Alfredo sauce over pasta can make a perfect meal for children picky children - soft, mild and creamy. But this version, made with fresh pasta and piles of freshly grated cheese, is a little more grown up. 


Fresh Pasta

This Alfredo sauce recipe comes from the experts at Serious Eats and has a reasonable amount of butter and cheese, but lots of cream.  I used my fresh pasta that I told you about last week for the fettuccine, and it was sublime.

Here's what you need:

Saturday, March 7, 2015

Fresh Pasta


On a snowy Saturday I decided to make fresh pasta for the first time. I received a KitchenAid Pasta Attachment set for my KitchenAid mixer as a Christmas gift and decided to give it a try.


First I needed to find a recipe for egg pasta. This recipe from Serious Eats worked beautifully. It includes extra yolks and made a wonderful, tender noodle.

Here's what you need to make the pasta: 

Saturday, September 6, 2014

Pork with Roasted Tomatillo Sauce


In the spring we planted four tomatillo plants in our garden.  Tomatillos are in the nightshade family, related to tomatoes.  I haven't had much luck with tomatoes in my garden, so I wasn't expecting much.  


But our tomatillo harvest has far exceeded expectations!  In August we harvested twelve pounds of tomatillos, and we have plenty more still growing.  


Thursday, August 28, 2014

Tart of the Month - Plum with Honey & Black Pepper


I know I've been taking the easy route with these tarts of the month, but this is the easiest one of all!  Just a few ingredients make a sweet and sour tart an a sprinkling of Maldon salt and black pepper add a savoury twist.


This recipe is from Bon Appetit and makes six tarts.  They look and taste fancy enough for company but they only take a few minutes to throw together and bake.

Here's what you need:


Sunday, June 29, 2014

Tart of the Month: Strawberry Tarts


June's tart of the month is strawberry, of course.  Just like the Queen of Hearts would serve on a summer's day. Strawberry season here in Ontario is generally mid-June to mid-July.  These beautiful, local strawberries are so different from the imported strawberries we get at other times of the year.  They smell so sweet and taste amazing.  


Once again I'm using store-bought pastry because I happened to have one last pie crust in the freezer.  But I did make pastry cream for the first time for these tarts.  Pastry cream is a thick cooked custard that can also be used to fill éclairs.  If you make your own pastry, the pastry cream recipe will fill at least 4 tarts.  My store-bought pie crust only made three tart shells, so I had pastry cream left over, which I used to make a quick berry trifle later in the week.   

Here's what you need for these delicious seasonal tarts:

Monday, September 23, 2013

Horseradish


Making your own horseradish is easy and pretty neat.  You need to take a few precautions with the spicy root, but the end result is great and you can control the heat to make it mild or super spicy.


All you need is horseradish root, vinegar, ice water and salt.  For equipment you'll need gloves, a peeler, a sharp knife and a food processor or blender.  


I brought my food processor outside for this project.  The fumes of the fresh horseradish are really strong.  You might even consider protective eyewear (like large sunglasses or even goggles) if you have sensitive eyes.  Mine were watering outside.  

Tuesday, July 2, 2013

Strawberry Ice Cream


Fresh local strawberries are in season and I've been waiting a year to make strawberry ice cream.  I'm positive that I recently read an article or post somewhere about the best strawberry ice cream.  I searched high and low for guidance but didn't find any.  And the strawberry ice cream recipes I did find were so completely different from each other, I really didn't know where to begin. 

Many recipes called for eggs, but some called for two egg yolks and some for ten!  Some recipes didn't use eggs at all.  Some called for whipping cream and half & half, some called for cream and whole milk.  


In the end, I got lazy and decided on a no-cook method based on this recipe, with a few changes.  The texture isn't quite perfect but it is bursting with strawberry flavour and super delicious!

Here's what you need:

Friday, September 28, 2012

Putting up with: Tomato Sauce

This is my husband's special recipe so I'll hand this one over to him... (JH)

Canning Tomato Sauce

Guest post by Matthew Brown

If it isn’t obvious already, Jen is the real chef in the house but I do like to help out and am not useless in the kitchen (or with the camera). Every fall, we go to the Trail’s End farmer’s market, get a bushel of Roma tomatoes and I make a pasta sauce.

I've been refining my recipe over the years. I started out using canned tomatoes and dry herbs, but these days, fresh is best and other than added tomato paste for a little added richness and thickness, everything is fresh from the market or our garden.
This is what we started off with:

tomato sauce ingredients

While you can substitute hotter or milder peppers to suit your tastes, we started with:
1 bushel of Roma tomatoes
3 large red onions
1 ½ cups of fresh basil
9 Hungarian peppers
9 super chili peppers
18 cloves of fresh garlic
9 bay leaves
3 tablespoons of salt
1 ½ - 3 tablespoons of sugar
3 sprigs of oregano
1 sprig of fresh rosemary (or 1 ½ tablespoons of Italian seasoning)
Olive oil

First off, you need to peel all those lovely tomatoes:

fresh roma tomatoes

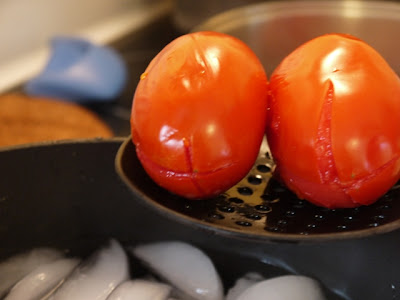
With that many tomatoes, you’d be crazy to do it just with a paring knife. Jen looked online and found that the easiest way to do it was to set up a little assembly line with a big pot of boiling water and a big pot of ice water.

ice bath

Before you put the tomatoes into the boiling water, use a knife to score an X at the bottom end of the tomato:

x tomato skin

With the size of our pots, we could fit about 10 tomatoes at a time into the boiling water. They only need about a minute or two in the boiling water, then you can transfer them into the ice bath. This loosens the skins. With some of them, you can just squeeze them and the fruit will pop right out of the skin; others, you’ll need to give them a little help and peel the skins off by hand or with the edge of a paring knife, but it is pretty easy regardless.

peeling tomatoes

After a little work, you’ll be left with several big bowls of skinless tomatoes.

peeled tomatoes

Before you move on to the next step, you just need to use your handy paring knife and cut the little stem parts out, so they end up looking like:

peeled tomatoes

Next up, prepping your onions, peppers and garlic!

red onion

You’ll use an immersion blender later on, so the dicing doesn't need to be too precise. Considering the amount of tomatoes involved, we needed to cook our sauce in three big pots. As I like to be organized [read: anal retentive] in the kitchen, I ended up making three individual bowls with equal amounts of onions and Hungarian peppers. (One large red onion and three Hungarian peppers to each bowl.)

onions and peppers

For the garlic and super peppers, I just used the little chopping bowl in Jen’s handy dandy Kitchen Aid food processor to chop together six cloves of garlic and three seeded super peppers for each batch. (Tip: super peppers are small so they are a pain to cut open and de-seed. If you just cut the stem end off, you can roll the pepper between your fingers and the seeds will fall right out. Huzah!)

chopped onions and garlic

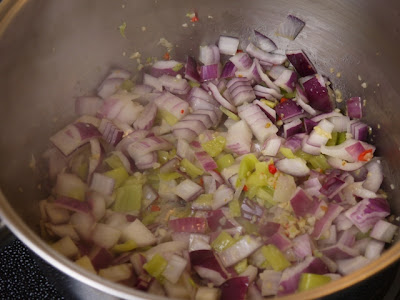
Now, time for some cookin’! In each of your large pots, drizzle some olive oil into the bottoms and put them to medium-high heat. Throw in all your onions, Hungarian peppers, garlic and super peppers and just cook them long enough to get them softened up, so that the onions start to turn translucent.

onions and peppers

Once that’s done, add in all your tomatoes. Before I was able to use the immersion blender, I used the edge of a pretty sturdy plastic flipper (?) [Ed. Spatula?] to cut the tomatoes into smaller chunks. No need to be gentle at this stage. Now you are ready to blend.

tomato sauce

We’re not huge fans of big chucks of tomato in our sauce, so I kept at it until the sauce was pretty smooth. Now you’re ready to “kicks the flavour, like Steven King writes horror”. [This is a guest post, which is why House of Pain lyrics are allowed to be quoted.]
Chop up all that beautiful fresh basil:

basil

I just divided it pretty evenly into the three pots and then added one tablespoon of salt, ½ tablespoon or a little more of sugar, ½ tablespoon of Italian season or finely chopped rosemary, a little bit of finely chopped oregano and a drizzle of olive oil to each batch.

fresh tomato sauce

The bay leaf is just in that photo for artistic purposes. I used the immersion blender again to get everything nicely mixed together, then put the bay leaves back in while keeping it at a low simmer for about half an hour.

Since Jen already covered the canning of her salsa verde so wonderfully, I won’t get into too much detail on the canning, except for a few key differences.
To keep everything safe and shelf-stable, you need to use a ½ teaspoon of citric acid in the bottom of each jar.

citric acid

citric acid for canning

Then, once all your lids are prepared and jars are sterilized / boiled and ready to go as in the salsa verde post, you’re ready to start filling the jars.

canning tomato sauce

The other key difference between the salsa verde and the pasta sauce is the time you need to boil them after the jars are filled. Since salsa verde has so much lime juice / citric acid, it doesn't need to boil as long, but since we are just using the regular canning method and not a pressure canner, and since the jars are so big, it is recommended that you keep the submerged, filled jars at a boil for 45 minutes. Better safe than sorry, as they say.

canning tomato sauce

However, in the end, it is worth the time and effort. The sauce is delicious and I know exactly what went into it and it is something I’m proud of. The cost of all the ingredients was probably the same as what it would have cost me to go to the store an just buy 12 jars of decent sauce, but that’s not really the point, is it? Not only was it fun to do, but I’m proud of the end result and also know it is healthy and that I don’t have to add anything extra to the sauce to make it flavorful like I would with a store-bought sauce.
After a long-but-fun day of cooking and canning, we treated ourselves to a nice glass of red wine and an absolutely delicious bowl of pasta with zucchini and freshly grated parmesan.  

spaghetti with homemade tomato sauce

Cheers!
How to can tomato sauce


Thursday, September 20, 2012

Spicy Roasted Corn Chowder


Fresh corn is in season and I love eating boiled corn on the cob, but here's another way to use fresh corn in a delicious, spicy chowder that'll make your house smell amazing!

I was inspired by this recipe but made a few changes.
Here's what you need:


6 cobs of corn, still in their husks
2.5 cartons chicken stock
A mixture of poblano, jalapeño and Hungarian or bell peppers
6 slices bacon
1 onion
3 garlic cloves
2 ribs celery
1 lb potatoes
3 Tbsp tequila
1 cup half and half (or milk or cream)
1 lime
crumbled feta or cotija cheese 


First, roast the corn.  Place the cobs on a baking sheet and stick them in a 350 degree oven for about 35 minutes. Roasting them in the husks gives them great flavour.


While the corn is roasting, roast some peppers.  I used these peppers from my garden. The yellow ones are mild Hungarian peppers.  The long green ones - I'm not sure what they are.  Maybe Anaheim? They're pretty spicy though.  I also used two jalapeños.  This turned out a little spicy for me so you might want to substitute some bell peppers for the hot ones if you don't like it too spicy. 

I'd also recommend putting some foil down on the pan under the peppers because they tend to leak as they roast.


Once the corn is roasted, carefully shuck it.  It'll be hot so let it sit for a few minutes or run it under cold water first.


Use the tip we talked about the other day to remove the corn from the cobs, but don't discard the cobs!


Put the cobs and half the corn in a pot.


Cover with chicken stock.  Bring it to a boil and simmer for 40 minutes.


Meanwhile take your roasted peppers and place them in a bowl.


Cover with plastic wrap.  This'll generate steam to help the charred pepper skins peel off.


Peel and chop the peppers, removing the seeds.  I used gloves.


While the corn stock is simmering, you can also chop your onion, celery, garlic and potatoes.


And dice the bacon.


In another large pot, brown the bacon.


Once browned, remove the bacon from the pot with a slotted spoon and transfer to a paper towel-lined plate.


Remove all but 1 Tbsp of the bacon grease from the pot and add in the onions and potatoes.


Sauté for about 5 minutes, then add celery, peppers and garlic and sauté 3 more minutes...


...until softened.  Add the tequila to the veggies.  


Once the corn stock has simmered for 40 minutes, remove the cobs and purée the stock until smooth.  


And add it to the vegetables in the other pot.  Simmer for about 10 minutes until slightly thickened, then add a cup of cream and the remaining corn kernels.  Bring back to a simmer and get ready to serve!


Fill your bowl with chowder and top with the crumbled bacon and cheese.


Serve with fresh bread.


This turned out pretty spicy. I would use fewer or different peppers next time, but it was extremely tasty.  And I love the corn cooking technique. I'll use it next time we have corn on the cob for dinner.