"A gourmet who thinks of calories is like a tart who looks at her watch." - James Beard
I'm not going to say these are simple to make but they're not that hard and they're worth it! It's a delicious appetizer, lunch or snack.
You need:
Rice paper wraps*
Rice vermicelli* (this is brown rice vermicelli but regular is fine)
Rice vinegar*
Cooked shrimp
Cucumber
Carrot
Diakon* (Japanese radish, optional)
Green onions
Cilantro
Bottled spring roll sauce* (or peanut sauce)
*avalable in Asian markets or major supermarkets
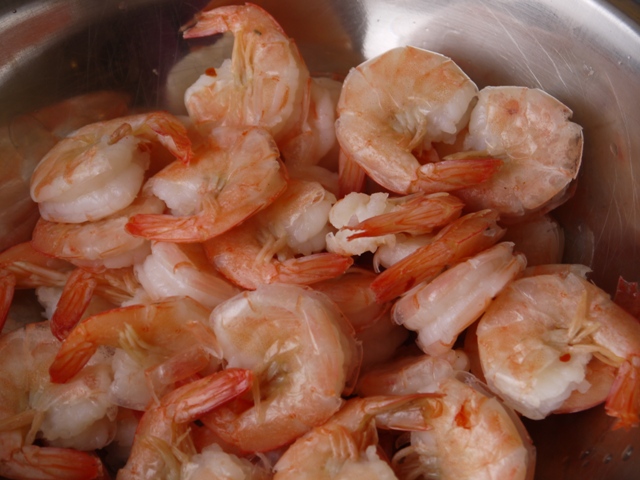
Defrost, poach and peel your shrimp if necessary.
Julienne the daikon. This is optional but adds a welcome crispness to the rolls.
Next slice the cucumber in half and scoop out some of the seeds
Julienne the cucumber (as best you can).
Same for the carrot.
Slice the green parts of two green onions lengthwise into long thin strips.
Pretty. I don't have the greatest fine knife skills but I'm pretty happy with how these turned out!
Slice your shrimp in half lengthwise and refrigerate them until needed.
Time to "cook" your rice noodles. Prepare them according to package directions, which can vary. Some will call for plunging into a pot of boiling water like pasta and some call for pouring boiling water over.
These ones wanted to be covered in hot tap water and soaked for 10 minutes so that's what I did. When looking for these in the store they may also be called rice sticks.
After 10 minutes the noodles will be pliable.
Drain them and toss with about a tablespoon of rice vinegar.
Now for the rice paper wrappers. Take a large flat dish and fill with hot tap water. I used a pie plate. Also, place a clean dish towel on the counter to work on.
Here's what they look like. They're a little tricky to work with but you get used to it after a few tries.
Submerge one rice paper wrapper in the warm water.
In a few moments it'll soften and become transparent.
Carefully remove the wrapper from the water.
And place flat on the towel.
Grab your sliced shrimp from the fridge and lay them in a line, cut side facing up.
Top with some julienned cucumbers, carrots, daikon and green onions.
Add a small handful of noodles.
And top with a few leaves of cilantro.
Now for the rolling. Carefully roll like a burrito, taking the side closest to you and folding it away from you over the filling. Then fold in both sides...
And roll over into a tube. The rice paper will stick to itself to seal.
You can see the pretty shrimp showing through the thin rice paper.
As you complete the rolls, place them on a plate lined with a damp paper towel, then cover them with another damp paper towel to keep them from drying out while you work.
You can also skip the shrimp and make vegetarian rolls with just the veggies.
You can slice these in half for presentation purposes but they're easier to pick up when left whole.
I used a store-bought spring roll dipping sauce with sweet chili flavour, but you can also whip up a peanut sauce if you're not dealing with allergies.
A little extra work for a crispy, healthy treat. I served these with a store-bought Thai coconut soup for a delicious meal. It made about 12 rolls which was way more than enough. They don't keep very well but you should be able to keep them overnight in the fridge wrapped in damp paper towels and then in plastic.
If you ever buy those frozen shrimp rings at the grocery store, consider this instead. Poaching your own shrimp gives you such a nice, fresh flavour, plus the opportunity to make useful shrimp stock from the shells. And it's so easy!
All you need is some frozen raw shrimp and some aromatics.
This is the shrimp I used, but any large, raw, shell-on shrimp is fine. This is a great resource for finding out about sustainable seafood. I'll admit, I didn't use it this time.
Fill a large, shallow pan with about an inch of water and add a bay leaf, garlic clove, a few peppercorns and a sprinkle of chili flakes. Bring the water to a simmer and add the frozen shrimp in their shells.
As the water starts to come back to a simmer, the shrimp will start to turn pink. Flip them over as they become opaque. They only need about 3-4 minutes.
Once they're just cooked through, remove them from the water with a slotted spoon or tongs and reserve the poaching liquid for your stock. Cooking shrimp in their shells gives them way more flavour than peeling them first.
To make shrimp cocktail, chill the shrimp and peel them but leave the tails on.
You can make an easy cocktail sauce with a tablespoon of horseradish, two tablespoons of ketchup and a few dashes of Tabasco sauce to taste. Serve on a platter with sliced lemon or in little cocktail glasses for an individual appetizer.
That's diced celery and celery leaves at the bottom of the glass. You can make these in advance and chill them in the fridge until guests arrive.
But save the shrimp shells! We're going to make a flavourful shrimp stock you can keep in the freezer and use in lobster bisque or any recipe that calls for fish stock.
In a medium pot, heat a little oil and add a celery stalk and the white parts of a couple of green onions or a quarter of a small white onion.
Add the shrimp shells and stir, cooking for about a minute.
Cover with water and throw in the shrimp poaching liquid. Bring to a boil. Reduce heat and simmer uncovered for about 20-30 minutes until reduced by about half.
Strain out the solids and place the stock in a freezer container.
I ended up with exactly 2 cups and put it in the freezer for next time I need a little flavour in a soup. Next time I'll show you what you can do with the rest of the poached shrimp.
If you're paying close attention, you may have noticed we eat a lot of steamed broccoli. That and steamed green beans are my go-to green veggie sides.
But just like roasted cauliflower and roasted Brussels sprouts, roasting broccoli brings out even more flavour and it's nice to have a different texture as well. It's not as low-cal as steamed broccoli but it makes a nice treat.
Preheat the oven to 400 degrees and break the broccoli into florets.
Drizzle the broccoli with a tablespoon or two of olive oil and sprinkle with kosher salt and cracked pepper.
Roast for about 25 minutes until tender-crisp and just beginning to brown on the tips.
When it's done, you can squeeze a little lemon over the broccoli or even sprinkle with some parmesan cheese. Or just eat it as is.
I served it with some chicken curry and basmati rice but it's great with just about anything. Try it for a tasty winter treat that makes eating your vegetables the best part of the meal.