Pages

 photo img_03.jpg  photo img_04.jpg  photo img_06.jpg  photo img_05.jpg  photo img_07.jpg

"A gourmet who thinks of calories is like a tart who looks at her watch." - James Beard


AOL Ad

Sunday, December 31, 2017

Instant Pot Black-Eyed Peas

Instant Pot Black-Eyed Peas

Black-eyed peas are traditionally served on New Years Day to bring luck in the coming year. 


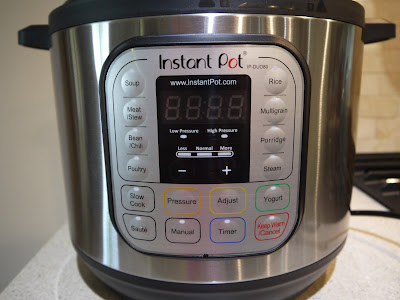
Instant Pot

They are SO easy to make in the Instant Pot, or any electric or non-electric pressure cooker, you don't need a special occasion to make these beans!  


Black-Eyed Peas

Enjoy them on New Years Day along with some Collard Greens for good luck! 

Here's the recipe:

Ingredients:
1 pound (454 g) dried black-eyed peas
4 slices bacon, cooked and crumbled
6.5 cups water
2 tablespoons Better Than Bouillon vegetable or chicken base

Better Than Bouillon is amazing stuff, but if you don't have it, you can use chicken stock in place of the water, or use stock cubes mixed into the water.

Directions:
Place all ingredients in the Instant Pot.  Set it to Manual at High Pressure for 25 minutes. 
Once cooking is complete, let the pressure release naturally.
Serve the black-eyed peas with some of the delicious cooking liquid, and use the rest of the liquid to make Collard Greens, or save it for soup!


Instant Pot Black-Eyed Peas

Sunday, December 17, 2017

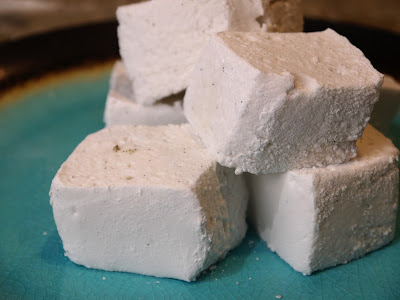
Bourbon Vanilla Marshmallows

 Bourbon Vanilla Marshmallows

My husband loves homemade marshmallows.  He has a nut allergy, so he's usually pretty wary of holiday cookies, but our dear friend made marshmallows one year and he loved them so much!  I had to try making them too. 

Bourbon Vanilla Marshmallows

Marshmallows are not difficult to make, but they require some things you may not normally use in your holiday baking.  A candy thermometer is one.  A stand mixer also makes things much easier. You'll also need corn syrup and gelatin, which not everyone has on hand. But the ingredients are inexpensive and easy to find.  Once you have them you can make marshmallows in any flavour you desire. 

Vanilla Bean

I made bourbon vanilla marshmallows, but the bourbon flavour doesn't really come through.  I would try using more bourbon next time. 

marshmallow

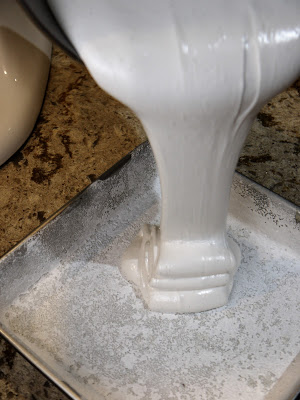
It is so neat to watch the clear liquid transform into white ribbons as you mix the marshmallows. 

Bourbon Vanilla Marshmallows

Marshmallows keep really well at room temperature for up to 6 weeks.  They're great in hot chocolate or on a cookie tray (and gluten free too!), or you can give them as gifts. 


Homemade Marshmallows

Adapted from this Epicurious recipe

Ingredients
2 vanilla beans
1 cup powdered sugar
2 tablespoons bourbon
vegetable oil or cooking spray
3 packets (7 grams each) unflavoured gelatin
1.5 cups granulated sugar
1 cup light corn syrup
1/4 teaspoon salt

Directions
Split the vanilla beans lengthwise and scrape out the seeds with a sharp knife. Place 1/3 of the vanilla bean seeds in a small bowl with the bourbon.  Place the rest of the seeds in a medium bowl with the powdered sugar.  Mix well, crushing the vanilla seeds with the back of a spoon to incorporate.  Let sit one hour.

Brush or spray a 9-inch square baking pan with vegetable oil.  Sprinkle with vanilla sugar and tap out the excess that doesn't stick to the sides. 

Place 1/2 cup water in the bowl of a stand mixer. Add the gelatin and stir to combine.  

Combine 1/2 cup of water, granulated sugar and corn syrup in a small pot and bring to a boil over medium heat, stirring until sugar dissolves. Add the empty vanilla bean pods to the sugar syrup and place the thermometer in the pot, not touching the bottom.  Boil until the syrup reaches 240 degrees F (this took about 7 minutes for me).  Remove from heat and use tongs to remove the vanilla beans. 

Use the mixer's whisk attachment and whisk the gelatin mixture at low speed.  Carefully pour the hot sugar syrup down the side of the mixer bowl with the mixer running. Increase the mixer speed to high and whisk for about 5 minutes until the mixture is very thick and looks like ribbons when you raise the whisk attachment. Add the bourbon and vanilla seed mixture and whisk until incorporated. 

Using a rubber spatula, pour the marshmallow mixture into the prepared pan.  Let stand, uncovered, at room temperature, at least 4 hours or overnight, until marshmallow is dry.

When you're ready to cut the marshmallows, cover a cutting board with vanilla powdered sugar and invert the pan onto the cutting board. Use a spatula to pull the marshmallow away from the sides if you need to.  Dust the top with vanilla powdered sugar.

Cut the marshmallows into 36 squares (or 64 smaller squares). Place each individual marshmallow in a bowl of vanilla powdered sugar and shake to cover.  

Store in a covered container separated by parchment paper.  


Saturday, November 25, 2017

Instant Pot Pork Ribs

Instant Pot Pork Ribs

I love to cook ribs low and slow, then grill them with BBQ sauce to make them crisp and flavourful.  But slow roasting the ribs in the oven takes hours.  You can get the same tender results in the Instant Pot in minutes! 

Instant Pot Pork Ribs

I normally make at least two racks of ribs in the oven, since it takes so much time and effort, but with this method, I can justify making just one rack for a weeknight dinner.  I never thought I'd have homemade ribs on a weeknight!


Instant Pot Pork Ribs

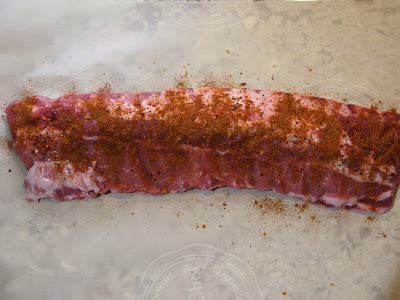
I use a homemade spice rub when I make ribs, but you can season them any way you like.  Montreal Chicken seasoning is great for ribs.  


Instant Pot Pork Ribs

In the Instant Pot you need to use the rack to cook ribs.  You also need some liquid for pressure cooking.  I used chicken stock this time, but apple juice, cider or beer would be great!


Instant Pot Pork Ribs

For tender ribs, cook on Manual for 21 minutes.  It will take about 40 minutes when you include time to build up and release the pressure.  Still reasonable for a weeknight dinner!

You can spread the ribs with your favourite BBQ sauce and serve when they come out of the Instant Pot, but I like to crisp them up on the grill.  


Instant Pot Pork Ribs


Here's the recipe:

Ingredients
1 rack spare ribs
2 tablespoons spice rub (see recipe below, or make/buy your own)
1 cup chicken stock, apple juice, beer or cider
BBQ sauce

Directions
Rub ribs all over with spice rub
Place rack in Instant Pot
Add stock, juice or beer to pot
Place ribs on rack in pot
Seal Instant Pot lid
Set Instant Pot to 21 minutes on Manual setting
Once done, let pressure release naturally
Grill or broil ribs, brushing with BBQ sauce until crisp


BBQ Spice Rub
1 tablespoon chili powder
1 teaspoon brown sugar
1 teaspoon ground cumin
1 teaspoon salt
1/2 teaspoon ground cinnamon
1/4 teaspoon cayenne pepper

Directions
Mix all spices together and store in a sealed container. 

Sunday, November 19, 2017

Homemade Limoncello

Homemade Limoncello

I love making homemade liqueurs. It's not always cheaper than buying them in the liquor store, but it is lots of fun, and you can make them to your own taste, in the amounts you need. 

This homemade Limoncello is bracingly strong and tart, and not too sweet.   


lemon in cheesecloth

I used this method to make Limoncello by suspending a whole lemon wrapped in cheesecloth over vodka to vaporize the lemon oils without muddying the flavour. 


homemade limoncello

I used a high-proof vodka, but you can use any clean-flavoured vodka you enjoy.  I don't believe there's a lot of taste difference between top-shelf and lower-end vodkas, so use what you like. 

I'm not usually terribly picky about using organic produce, but for this I highly recommend finding organic lemons. Everything in the lemon skin will go into the liqueur, including any pesticides lingering there.  If you can't get organic, scrub them very well before using. 

Bundle the lemon into cheesecloth and tie it with a length of twine, leaving a long string to suspend the lemon over the vodka.


homemade limoncello

I used only a cup of vodka to make about 375mL of liqueur, but you can easily double the recipe using two lemons if you have a large enough jar to suspend them without touching the vodka.  

Pour the vodka into a wide-mouth jar, suspend the lemon above and wrap the string around the mouth of the jar until it holds on its own.  Then put a lid on the jar. 


homemade limoncello

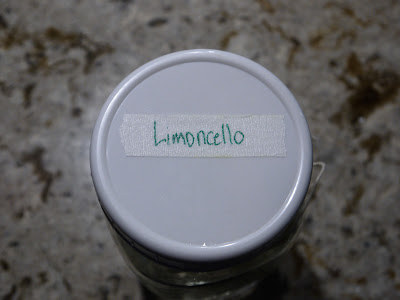
Label it! Then put it in a cool cupboard for a month.  

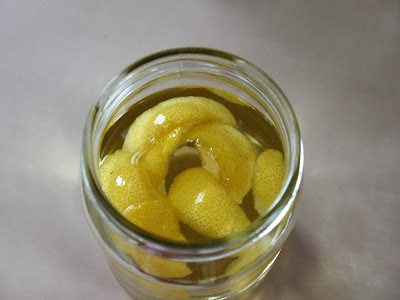
When a month has passed, you'll see condensation on the jar.  That's the alcohol drawing out the flavour from the lemon peel.


homemade limoncello

Remove the lemon in cheesecloth and discard it.  Make a simple syrup by heating water and sugar.  Once the sugar is dissolved, add the zest of one new, fresh organic lemon and let it steep for 15 minutes.


homemade limoncello

Mix the syrup and lemon peel with the vodka and let it sit for another 30 minutes.


homemade limoncello

Strain the liqueur into a bottle and discard the lemon peels. I used an old gin bottle and my awesome husband made this cute label for the bottle.

Homemade Limoncello is great to give as a gift, and there's still enough time to make a batch before Christmas! 

It is great served over ice, mixed with prosecco, or in a cocktail. 

Here's the recipe.  Cheers!

Ingredients:
2 organic lemons
1 cup (250mL) vodka
1/2 cup sugar
1/2 cup water

Equipment:
large wide-mouth jar with lid
cheesecloth
twine
peeler or paring knife to peel lemon

Instructions:
Place vodka in a large, wide-mouth jar.
Wrap 1 lemon in cheesecloth and tie string around the top to secure it. Wrap the string around the mouth of the bottle to suspend the lemon over the vodka.  Make sure the lemon doesn't touch the vodka. 
Put the lid on the jar and store it in a cool, dark place for 4 weeks.
Heat the water and sugar in a saucepan. Peel the second lemon, avoiding the white pith.  Once the sugar has dissolved in the water, add the lemon peel to the syrup and let cool for 15 minutes. 
Mix the lemon syrup with the vodka and let sit for 30 minutes.
Strain the Limoncello and keep, refrigerated in a pretty bottle or give as a gift. 

Saturday, October 28, 2017

Chicken Cauliflower Sheet-Pan Shawarma

Chicken Shawarma with cauliflower

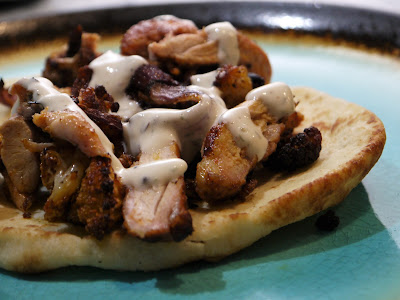
This recipe is totally inauthentic, but it tastes amazing.  Chicken shawarma is one of my favourite take-out meals, but it's not so easy to make at home.   This version gives you the wonderful flavours of chicken shawarma, with a hit of healthy vegetables and an amazing, easy white garlic sauce.  Serving it on mini-naan bread, taco-style, makes it a decadent, delicious one-pan dinner. 


roasted chicken and cauliflower shawarma

The recipe is inspired by this one at Food52, but I've made some changes and added the awesome white sauce.  Roasting the veggies and chicken together on one tray makes this one of the most easy and delicious meals I've made in a long time.  


mini naan

These mini-naan make a perfect serving vessel for the shawarma-flavoured filling, but if you can't find them you can use pita or any other flatbread, warmed until soft.  Or just serve the chicken mixture on its own or over rice.  Just don't forget the sauce!


White Sauce for Shawarma

This white sauce is amazing!  I love this sauce, and I've seen some very complicated recipes for it but this one is so simple, tangy and garlicky, it's perfect with the rich shawarma and naan. 


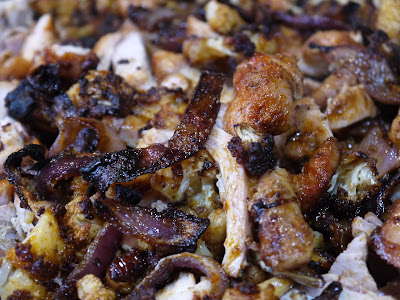
chicken cauliflower shawarma

You've got to try this recipe.  

Ingredients:
For the Shawarma
1 medium head cauliflower, cut into florets
1 medium red onion, sliced
3 tablespoons olive oil
1 tablespoon ground cumin
1 tablespoon smoked paprika
1 teaspoon ground coriander 
1 teaspoon garlic powder
1/2 teaspoon cayenne pepper
1 tablespoon kosher salt 
1/2 tablespoon ground black pepper
6 boneless skinless chicken thighs
6-8 mini naan, pitas or flour tortillas

For the White Sauce
1/2 cup mayonnaise
1/3 cup greek yogurt
1 teaspoon garlic powder
1/2 teaspoon ground black pepper
1/2 teaspoon salt
1/4 teaspoon dried dill (optional)
1 teaspoon sugar
1 1/2 tablespoons white vinegar


Directions:
For the Shawarma
Preheat the oven to 425 degrees.  Place the cauliflower and onions in a large bowl and coat with 2 tablespoons of oil. Mix together all the spices, salt and pepper.  Toss half the spice mixture with the cauliflower mixture until it's covered.  Spread the cauliflower mixture on a large sheet pan and roast for 20 minutes.

In the same bowl, coat the chicken thighs with 1 tablespoon oil and the remaining spice mix and let sit at room temperature. 

When the cauliflower has roasted for 20 minutes, remove the pan from the oven and toss the cauliflower. It will have shrunk a bit. Make room on the pan for the chicken thighs and spread them on the pan in a single layer around the cauliflower.  Roast for 20 more minutes, checking halfway through and flipping the chicken and tossing the cauliflower so it doesn't burn.  Some parts of the cauliflower will get quite dark and crispy.  This is good!

Meanwhile make the white sauce. 
Mix all ingredients together until smooth and runny. Taste and adjust seasonings (add more salt or garlic if needed).  Refrigerate until ready to use. 

To assemble:
When the chicken and cauliflower are done, remove the pan from the oven.  Heat naan according to package directions or warm pita or tortillas, or serve over rice.  Pile the chicken mixture on warm bread or rice and drizzle with the white sauce.  


Wednesday, October 18, 2017

Ham & Cheese Scones

Ham and cheese scones

I like scones, but I haven't made them in the past because they don't keep very well and it's hard for just the two of us to get through a batch before they're stale. 

Ham and cheese scones

These scones are essentially a meal.  They are large, and filled with ham and cheese, making them filling, savoury and delicious!

scones - butter and flour

Making the scones isn't difficult.  The hardest part is working the butter into the flour, but it's not that tricky.  Just rub it together with your fingers until it's all incorporated.  

diced ham

If you have leftover roast ham, it would be great in this!  Country ham would be fantastic.  I didn't so I just bought a ham steak from the grocery store and diced it up. You'll want a thick piece of ham for a nice dice.  

baking scones

The dough has plenty of cream in it and is quite wet.  Pat it down on parchment into a round.

cheesy scones

The dough gets cut into triangles and topped with lots of cheese before baking.

ham and cheese scone

The finished scones are great warm or at room temperature.  If you can't finish them the day they're made, pop them in the freezer and thaw before eating, or warm them in a 350 degree oven for about 10-15 minutes. 

Here's the recipe, enjoy!

Ingredients:

2 cups flour plus more for dusting
1 tablespoon baking powder
2 teaspoons sugar
1 teaspoon kosher salt
4 tablespoons cold butter cut into 1/2-inch cubes
1 cup cold cooked ham, diced
2 green onions, chopped
3/4 cup sharp cheddar cheese, shredded
1/4 cup milk3/4 cup 18% table cream

Directions:

Preheat oven to 400 degrees.  Mix together flour, baking powder, sugar and salt in a large bowl.  Add the butter and rub each cube between your fingers into the flour until it dissolves and the flour resembles coarse meal. 

Add the ham, onions and 1/4 cup of the cheese to the flour mixture and toss to combine.  Add the milk and cream and mix with a wooden spoon or rubber spatula until combined into a shaggy dough. 

On a floured work surface, pat the dough into a 7-inch circle, about 1 inch thick.  Cut into 6 wedges and place on a parchment-lined baking sheet.  Sprinkle each wedge with the remaining shredded cheese.  

Bake 25 minutes until golden and eat these for breakfast, lunch or snacks.  Great with soup too! 

Wednesday, September 27, 2017

Road Trip - Ottawa

ottawa parliament buildings

We recently had a quick weekend away in Ottawa.  The main purpose of the trip was to see a concert, but we decided to make a weekend out of it! 


Empire Ontario Craft Cider

As we drove the 401 East of Toronto, I started looking for interesting craft beer and cider stops along the way.  We were lucky to find Empire Cider Co. just off the highway near Trenton. 

This is a tiny operation out of a garage, but they make lovely cider.  We tasted all the varieties and grabbed some bottles to take home.  


Signal Brewery Belleville Ontario Craft Beer

Next, we wanted to stop for lunch and found Signal Brewery near Belleville.  This is a brand new brewery in the old Corbyville Distillery, and it's gorgeous!  


Signal Brewery Belleville Ontario Craft Beer

They were out of a few of their beers, but the ones we tried were tasty.  They have a huge, beautiful patio overlooking the Moira river, and plenty of seating indoors.  


Pork Belly Bao Buns Signal Brewery

The food was great too! We had chicken and waffles and pork belly bao buns. 


Tooth and Nail Ottawa


Once we arrived in Ottawa we wanted to check out some more craft beer.  We headed to Tooth and Nail Brewing in the Hintonburg area of Ottawa. It's a great little brew pub in a fun neighbourhood.


Pastrami Sandwich at Tooth and Nail, Ottawa

They have their own beer on tap, which Matt really enjoyed, plus craft beer and cider from other breweries, and a nice menu of tasty sandwiches.   


Andaz Ottawa Byward Market

We checked in to our hotel, the Andaz Ottawa Byward Market.  We really loved this hotel.  It is right in the centre of the best neighbourhood in Ottawa for restaurants and bars, and easy walking distance to Parliament and other attractions. 


Royal Canadian Mint, Ottawa

We walked around Byward Market and took a tour of the Royal Canadian Mint, which was really interesting!  They don't produce currency at this location, but they do make collector coins out of gold and silver.  They have a great gift shop too!


Fortissimo at Brothers Beer Bistro, Ottawa

For dinner, we headed to one of the top craft beer destinations in Ottawa, which also happened to be across the street from our hotel in Byward Market, Brothers Beer Bistro.   The beer selection, cocktails, food and service were awesome!


Rainbow Trout at Brothers Beer Bistro

I had rainbow trout with Israeli couscous, romesco, rapini and preserved lemon. It was delicious!  Matt had pulled duck poutine and he loved it.  


The King Eddy, Byward Market, Ottawa

The next morning we had brunch at the King Eddy in Byward Market. 


Chicken and Waffles at The King Eddy, Byward Market, Ottawa

Matt had chicken & waffles and I had a great burger. 


MOSAÏCANADA 150/Gatineau 2017

Before heading home, we crossed the bridge to Gatineau, Quebec, where there is an amazing horticultural sculpture exhibit that's free to the public until October 15, 2017. 


MOSAÏCANADA 150/Gatineau 2017

Part of Canada150 celebrations, MosaiCanada fills a public park with huge plant sculptures depicting Canadian history and culture.  


MosaiCanada 150 Gatineau

It's really amazing! 

We had a wonderful time in the Ottawa region and it left us wondering why we don't visit more often.  We'll definitely be back!