Last time I made store-bought gnocchi I really liked it but I vowed to make the real thing from scratch. Now that I've done it I can see the benefits of both. Home made gnocchi is very simple to make with only a few ingredients, but it's somewhat time-consuming and messy. I wouldn't go all out with home made on a week night, but it is well worth it and actually fun to do if you have a bit of time. The results are fantastic. The gnocchi are so tender and full of potato flavour.
Once you make them, they're also incredibly simple to cook and serve. I tossed them with some browned butter and sage and a little fresh Parmigiano Reggiano.
I did a bunch of research on the best way to make gnocchi. Some recipes call for boiling the potatoes, some say bake them. Some call for eggs, some don't. This article gives a very good run-down of all the different techniques and I ended up using many of her tips. Baking the potatoes makes them drier and easier to work with. And using an egg helps the dough come together more easily. I was very happy with my results but I'd be willing to experiment with some different methods.
The best part is that you probably have all the ingredients you need to make gnocchi in your kitchen right now! All you need it potatoes, flour and eggs. I used two large russet (baking) potatoes and one white potato, plus about 1 1/2 cups of flour, one egg, about 1/2 a teaspoon of salt and a pinch of fresh nutmeg.
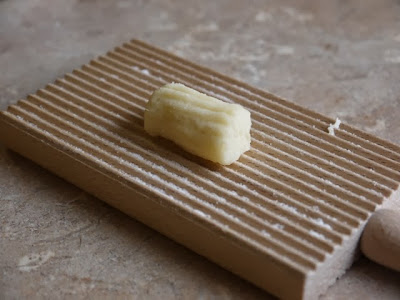
As for special equipment, you don't need any of this, but things will go much smoother with a potato ricer. If you don't have one, you can push the cooked potato through a fine mesh sieve to aerate it and keep the dough light. I was wishing for a bench scraper to fold the dough and also to cut the gnocchi. My hands and a butter knife were a suitable substitute. I also used an inexpensive gnocchi board to roll ridges into the dumplings. You can just use the tines of a fork instead.
Peel the hot potatoes or scrape the flesh from the skin and put it through a ricer or sieve. You can rice the hot potatoes directly onto the flour, but I wanted to weigh the potato, so I riced it into a bowl. I ended up with 600g of riced potato flesh and used about 200g of flour all together.
Sprinkle the potato over the flour. It's important that the potatoes are still quite warm when you make the dough, so work as fast as you can.
Gently fold the potato into the flour with your hands. Make a well in the centre.
Beat the egg and pour it into the well in the potato/flour mixture.
Gently mix it all together with your hands until a soft dough forms, adding more flour if necessary. Then set the dough aside and clean the work area to get ready to roll out the gnocchi.
Pat the dough into a large, flat rectangle.
Then slice it into strips.
With floured hands, roll the strips into long tubes.
Then cut the tubes into small dumplings.
You can cut more than one tube at a time once you get the hang of it.
You can roll each dumpling on the gnocchi board.
If you don't have the gnocchi board, you can use a fork to make ridges in the dumplings. The texture helps the sauce adhere, but you don't need to do it if you don't want to.
Then place them on a floured baking tray to keep them from sticking together.
To cook the gnocchi, boil them in salted water just until they float to the surface - about 1 to 2 minutes.
Meanwhile, heat a few tablespoons of butter over medium heat.
Let the butter brown a little but don't let it burn! Add the sage.
Once the gnocchi float to the top of the boiling water, scoop them out with a slotted spoon.
Add them to the brown butter and toss it all together.
This is a great first course for a fancy meal, but it makes a hearty dinner on its own with a tossed salad on the side.
Serve it up with a sprinkle of fresh-ground pepper and some parmesan cheese.
This recipe made enough for four main-course servings, so I froze half. You can make these in advance and hold them for a couple of hours in the fridge, but they will start getting a bit mushy after that. It is best to freeze them if you need to hold them longer than that. Freeze on a floured tray for a couple of hours, making sure they're not touching each other.
Then, once they're frozen, place them in a freezer bag for next time you need a tasty meal in minutes.
This is definitely a fun project and the results are worth the effort! Delicious!


No comments:
Post a Comment